
The Smart Way to Prep Your Outdoor Plumbing Before the First Cold Snap
Georgia winters are unpredictable, and the first hard freeze often arrives before homeowners expect it. Outdoor plumbing is the most vulnerable part of your home when temperatures drop below 32 degrees. Water expands by roughly nine percent when it freezes, and that expansion puts enormous pressure on pipes, hose bibs, and irrigation lines. A single frozen pipe can crack, split, and release hundreds of gallons of water into your yard or crawl space. The good news is that outdoor plumbing prep is simple when you start early. Most winterization tasks take less than an afternoon to complete. This guide walks you through the smart way to prep your outdoor plumbing before the first cold snap hits Woodstock, Marietta, Canton, and the surrounding metro Atlanta area. Follow these steps now and you can avoid costly emergency repairs later.
How to Winterize Outdoor Faucets and Hose Bibs Before Freezing Weather
Outdoor faucets, also called hose bibs or spigots, are the most common victims of the first cold snap. They sit exposed on the exterior wall of your home, which means they freeze faster than any other plumbing fixture. When a hose bib freezes, the ice often forms inside the pipe just behind the wall where you cannot see it. That hidden ice plug can split the pipe, and you will not discover the damage until you turn the faucet on in spring. Winterizing outdoor faucets involves disconnecting hoses, shutting off interior valves, draining the line, and adding insulation. Each step matters, and skipping one can undo the protection of the others. Homeowners in North Georgia should complete this process by mid to late November. Prepping now, before the rush, gives you time to catch problems while the weather is still mild.
Step One to Winterize Outdoor Faucets: Disconnect and Drain Every Hose
The single most important step in winterizing outdoor faucets is disconnecting every garden hose from every spigot. A connected hose traps water inside the faucet body and the pipe behind it, and that trapped water has nowhere to go when it freezes. Even frost-free hose bibs fail when a hose is left attached, because the hose prevents the internal valve from draining properly. Walk your entire property and check every faucet, including the ones on the side of the house you rarely use. Detached hoses should be drained completely by stretching them out on a downhill slope and letting gravity pull the water out. Coil the empty hoses and store them in a garage, shed, or basement where freezing temperatures cannot crack the rubber. Hose reels mounted on exterior walls should also be emptied and covered. This one habit prevents more winter faucet damage than any other step on this list.
After the hoses are off, open each outdoor faucet fully and let it run for a few seconds. This releases pressure and flushes out any debris sitting in the valve seat. Watch how the water flows while you have it open. Weak flow, sputtering, or dripping after shutoff are signs the faucet already has a worn washer or a failing valve. Fixing a small faucet problem in October is far cheaper than replacing a burst fixture in January. Cold weather makes existing leaks worse because dripping water freezes inside the faucet body overnight. A faucet that drips all winter can also form dangerous ice patches on walkways and driveways. Noticing a drip you cannot fix? Click here for our faucet repair service and we will handle it before the freeze arrives.
Once the faucet checks out, close it and inspect the exterior caulking where the pipe passes through the wall. Gaps around the penetration let cold air reach the pipe inside the wall cavity, which is exactly where hidden freezes happen. Seal any gaps with exterior-grade silicone caulk or expanding foam. Check the faucet mounting screws too, because a loose hose bib can wiggle and stress the solder joint behind it. Look underneath the spigot for water stains or green corrosion on the pipe, which signal a slow leak that has been running for months. Crawl spaces below outdoor faucets deserve a quick flashlight inspection as well. Damp insulation or a musty smell under the faucet location means water is escaping somewhere. Catching these clues in fall saves you from a much bigger repair in the middle of winter.
Step Two to Winterize Outdoor Faucets: Shut Off Interior Valves and Drain the Lines
Many homes in the Woodstock and Kennesaw area have dedicated shutoff valves for outdoor faucets located inside the basement, crawl space, or utility room. Winterizing outdoor faucets properly means finding these valves and closing them before the first freeze. Trace the pipe from the back of each hose bib into the house until you find a round or lever-style valve. Turn the valve fully clockwise, or a quarter turn for lever handles, until the water supply to the spigot stops. Then go back outside and open the faucet to drain the remaining water out of the line. Leave the outdoor faucet in the open position all winter so any residual moisture has room to expand. Some shutoff valves include a small bleeder cap that lets you drain the interior section of pipe as well. Open that cap over a bucket and let the line empty completely.
If you cannot find a dedicated shutoff valve, your outdoor faucets are fed directly from the main water supply lines. Homes built this way rely entirely on frost-free sillcocks or exterior insulation for protection. A frost-free hose bib has a long stem that places the actual valve 8 to 12 inches inside the heated wall cavity. These fixtures work well, but only when installed with a slight downward pitch that lets the barrel drain after each use. An improperly pitched frost-free faucet holds water in the stem and freezes just like a standard spigot. Older homes may still have original standard hose bibs with no freeze protection at all. Upgrading to frost-free models is an affordable fall project that pays for itself the first winter. A licensed plumber can also add interior shutoff valves so future winterization takes minutes instead of guesswork.
Draining the lines is also the right time to test your main water shutoff valve. Every homeowner should know where this valve is and confirm it actually works before an emergency happens. Main shutoffs are usually located near the water meter, in the basement, or where the supply line enters the home. Turn it off, open a faucet inside to confirm the water stops, then turn it back on. Valves that have not moved in years often seize or leak when you finally need them. A frozen pipe emergency at 2 AM is not the moment to discover your shutoff valve is stuck. If your valve is corroded or will not close fully, have it replaced this fall. Concerned about aging supply plumbing? Click here for our water supply line services and we can inspect and update your shutoffs.
Step Three to Winterize Outdoor Faucets: Insulate Spigots and Exposed Pipe
Insulation is the final layer of protection when you winterize outdoor faucets. Foam faucet covers cost just a few dollars at any hardware store and take seconds to install. These covers trap a pocket of air around the spigot, and that trapped air slows heat loss dramatically during overnight freezes. Slide the cover over the faucet, hook the internal loop around the spout, and tighten it snug against the wall. Hard shell covers with foam interiors last longer than soft bag styles and stand up better to Georgia rain. Install a cover on every exterior faucet, including spigots on detached garages, sheds, and pool equipment pads. Check the covers after windy storms because they can loosen and slip off. A cover lying in the grass protects nothing.
Exposed pipe running along exterior walls, through crawl spaces, or out to irrigation systems needs insulation too. Foam pipe sleeves slide over straight pipe runs and seal with adhesive strips or tape. Measure your pipe diameter before buying sleeves, since half inch and three quarter inch pipes need different sizes. Fiberglass pipe wrap works well for elbows, valves, and odd shapes that foam sleeves cannot cover. Pay special attention to pipes near crawl space vents, because cold drafts through open vents are a leading cause of frozen pipes in North Georgia homes. Close foundation vents once nighttime temperatures start dropping into the 30s. Homes on pier foundations with fully exposed underfloor plumbing need every pipe wrapped without gaps. Even one uninsulated elbow can freeze and split while the rest of the line stays protected.
For pipes in extremely vulnerable locations, heat cable adds active freeze protection that insulation alone cannot match. Heat cable, sometimes called heat tape, runs along the pipe and warms it whenever temperatures approach freezing. Modern self-regulating cables adjust their output automatically and use very little electricity. Wrap the cable according to the manufacturer instructions, then cover it with insulation for maximum efficiency. Never overlap heat cable on itself, because overlapping creates hot spots that can damage the pipe or start a fire. Plug heat cable into a GFCI protected outdoor outlet only. This combination of cable plus insulation protects pipes through even a multi-day hard freeze. Homes that have experienced frozen pipes in past winters should treat those problem spots with heat cable this fall.
Protecting Irrigation Systems and Underground Water Lines From Freeze Damage
Irrigation systems and buried water lines are easy to forget because they sit out of sight. Unfortunately, out of sight plumbing suffers some of the most expensive freeze damage every winter. Sprinkler backflow preventers sit above ground and freeze quickly, and a cracked backflow device can cost hundreds of dollars to replace. Shallow irrigation lines in Georgia are often buried only 6 to 8 inches deep, which puts them within reach of a prolonged hard freeze. Underground water supply lines to detached buildings, outdoor kitchens, and pool houses face the same risk. Freeze damage in buried lines is especially frustrating because leaks can run undetected for weeks. Your water bill climbs, your yard develops soggy patches, and the source stays hidden underground. Protecting these systems before the first cold snap prevents all of it.
Winterizing Your Irrigation System Before the First Freeze
Winterizing an irrigation system starts at the controller. Set the timer to the off or rain mode position so the system does not run during freezing weather. A sprinkler system that activates during a freeze coats your lawn, driveway, and sidewalks in sheets of ice. Next, locate the irrigation shutoff valve, which usually sits in a valve box near the water meter or where the line branches off the main supply. Close this valve completely to isolate the sprinkler system from your home’s water supply. Then open the drain valves or test cocks on the backflow preventer to release pressure from the lines. Water trapped under pressure freezes faster and does more damage than standing water. These first steps take ten minutes and prevent the most common irrigation freeze failures.
The backflow preventer deserves special attention during irrigation winterization. This brass device sits above ground, fully exposed to cold air, and it is the most frequently freeze-damaged component in any sprinkler system. Wrap the backflow preventer in insulating foam, a fiberglass pouch, or an insulated backflow cover rated for outdoor use. Leave the drain ports accessible so moisture can escape. Some homeowners remove the backflow device entirely and store it indoors for winter, which is the most reliable protection available. If you remove it, cap the open pipes to keep debris and insects out. A cracked backflow preventer often does not reveal itself until spring startup, when water sprays everywhere the moment you open the valve. Replacing one is a job for a licensed plumber because backflow devices protect your drinking water from contamination.
Fully draining the underground lines is the last step, and there are two ways to do it. Systems with manual or automatic drain valves at low points will empty by gravity once the supply is shut off. Systems without drains need a compressed air blowout, where an air compressor pushes remaining water out through each zone. Blowouts require the correct air pressure, usually 40 to 80 PSI depending on pipe type, because excessive pressure destroys fittings and sprinkler heads. Run each zone until only air mist comes from the heads, then move to the next zone. Never stand over sprinkler heads during a blowout. Most homeowners hire this out since compressor rental and pressure mistakes often cost more than professional service. In the milder North Georgia climate, a proper drain-down protects most systems through winter. Homes at higher elevations near Ball Ground and Jasper should consider the full blowout for extra security.
Protecting Underground Water Lines and Detached Building Plumbing From Freezing
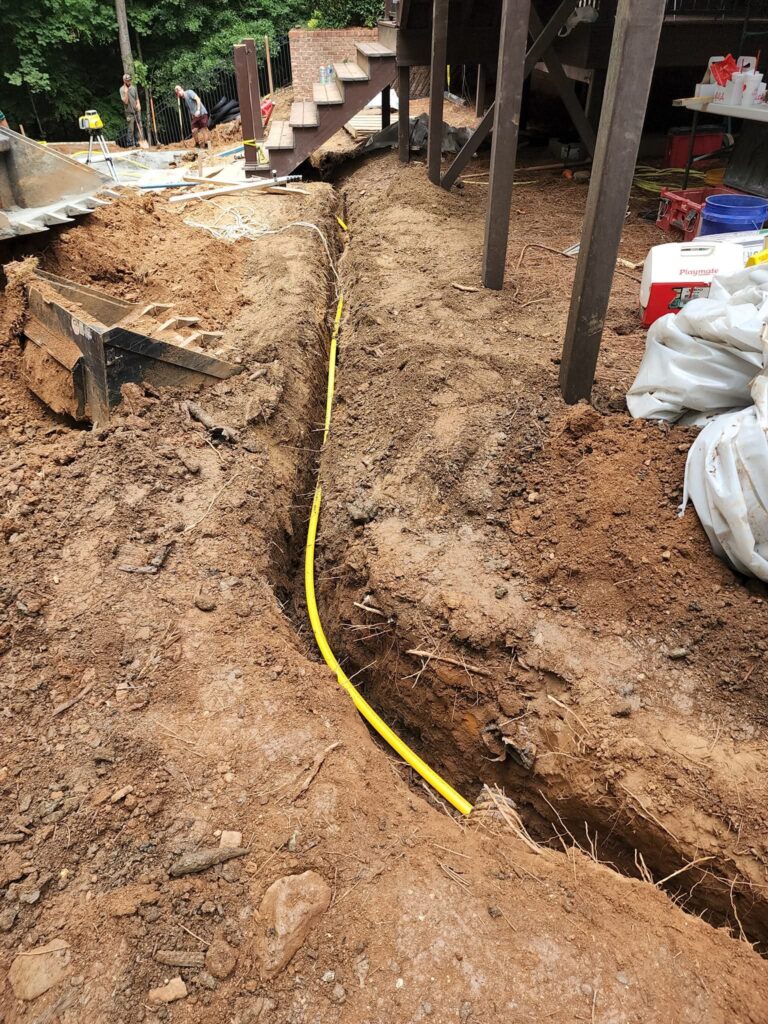
Underground water lines freeze less often than exposed pipe, but when they do, the repair involves excavation and serious expense. Georgia’s frost line is shallow, roughly 5 to 10 inches in the metro Atlanta area, so lines buried at proper depth usually stay safe. Problems arise where lines rise out of the ground to enter a building, feed a yard hydrant, or connect to outdoor fixtures. These transition points are where underground lines freeze first. Wrap every above-ground riser in pipe insulation before the first cold snap. Yard hydrants should be the frost-proof type that drains below grade after each use. Standard hydrants that hold water above the frost line will split during a hard freeze. Inspect each riser for existing cracks or corrosion while you insulate it.
Detached buildings with plumbing need their own winterization plan. Pool houses, workshops, guest cottages, and outdoor kitchens often have supply lines that receive no heat from the main home. If the building will sit unused all winter, shut off its water supply at the isolation valve and drain every fixture inside. Open the lowest faucet and the highest faucet at the same time so air can push the water out. Flush toilets after the supply is off, then pour a cup of non-toxic RV antifreeze into each toilet bowl and drain trap. Antifreeze in the traps prevents the standing water from freezing and cracking the porcelain or the trap itself. Water heaters in unheated buildings should be drained completely or left powered on with the thermostat set low. A drained system cannot freeze, which makes this the safest approach for any building you will not visit regularly.
Buried lines that have frozen in past winters signal a depth or routing problem that insulation alone cannot fix. A line that runs too shallow, passes under a driveway where frost penetrates deeper, or crosses an exposed ditch will freeze again. The permanent fix is reburying the line below frost depth or rerouting it through protected ground. Fall is the ideal season for this work because the soil is dry and excavation is easy. Watch for warning signs of existing underground leaks while you prep for winter. Unexplained wet spots, unusually green grass strips, low water pressure, and rising bills all point to a hidden leak. A small underground leak becomes a major one when freezing and thawing cycles work on the weakened pipe. Suspect a hidden leak on your property? Click here for our leak detection service and we will pinpoint it without tearing up your yard.
Preventing Frozen Pipe Bursts in Crawl Spaces and Exterior Walls
Crawl spaces are the freeze zone that homeowners overlook most often. Pipes running under the floor sit in unheated air all winter, and open foundation vents funnel freezing wind directly across them. Start your crawl space prep by closing or covering every foundation vent once cold weather arrives. Automatic vents that close on their own are an inexpensive upgrade worth installing this fall. Inspect every visible pipe under the house and wrap any bare sections in foam insulation. Look closely at pipes near the vents and along the perimeter walls, because those freeze first. Check that your crawl space access door seals tightly, since a gap there dumps cold air under the whole house. Sealing air leaks around the rim joist with foam adds another layer of protection to nearby plumbing.
Pipes inside exterior walls are harder to protect but just as vulnerable. Kitchen and bathroom supply lines on outside walls freeze during extended cold spells, especially when cabinet doors block warm room air. During hard freezes, open the cabinet doors under sinks on exterior walls so household heat can reach the pipes. Letting a thin stream of cold water drip from the farthest faucet keeps water moving through the system during the coldest nights. Moving water resists freezing far longer than standing water. Keep your thermostat set no lower than 55 degrees, even when traveling, so wall cavities retain some warmth. Homes with a history of wall pipe freezes should have those lines rerouted or insulated properly by a professional. Repeated freezing weakens pipe walls a little more each winter until they finally fail.
Know the warning signs of a frozen pipe so you can act before it bursts. Reduced flow or no water at a single fixture during a freeze means ice is forming somewhere in that line. Frost on exposed pipe, bulging pipe sections, and gurgling sounds are also red flags. Shut off the main water valve immediately if you suspect a freeze, because the burst usually happens during the thaw when pressure returns. Thaw frozen sections gently with a hair dryer or heat lamp, working from the faucet back toward the blockage. Never use a torch or open flame on a frozen pipe. A pipe that has already split will flood the moment the ice melts, so watch for leaks as the line thaws. If water starts spraying, keep the main valve closed and call for help right away. Dealing with a split line? Click here for our burst pipe repair service and we will respond fast, day or night.
Why You Need Professional Outdoor Plumbing Winterization From Plumb Medic
DIY winterization covers the basics, but a professional inspection catches the problems you cannot see. Licensed plumbers evaluate pipe condition, valve function, insulation coverage, and freeze risk in one visit. They spot the corroded fitting behind the hose bib, the shutoff valve that will not seat, and the crawl space line one hard freeze away from failure. Professional winterization costs a fraction of one emergency burst pipe repair. Water damage from a single frozen pipe averages thousands of dollars once flooring, drywall, and insulation are replaced. Scheduling a fall plumbing checkup now is the smartest money you will spend on your home this year.
The Real Cost of Skipping Outdoor Plumbing Winterization
Skipping winterization is a gamble that many Georgia homeowners lose every winter. A burst supply line can release up to 250 gallons of water per day into your home. That water destroys drywall, warps flooring, ruins insulation, and soaks personal belongings within hours. Mold growth begins in as little as 24 to 48 hours after water intrusion. Insurance may cover sudden pipe bursts, but claims raise premiums and rarely cover every cost. Your deductible alone often exceeds the price of professional winterization.
The damage extends beyond your interior too. A cracked backflow preventer means replacing an expensive brass assembly and paying for required recertification. Split irrigation lines demand trenching, pipe replacement, and lawn repair in spring. Frozen yard hydrants and outdoor kitchen lines add more excavation costs to the list. Water lost through undetected underground leaks inflates your utility bills month after month. Every one of these failures traces back to a winterization step that took minutes to complete.
There is also the disruption to consider. Frozen pipe emergencies always strike at the worst times, during holidays, overnight, or while you are out of town. Families end up without water for days while repairs are scheduled and completed. Hotels, restoration crews, and contractor visits pile stress on top of expense. Prevention removes all of that uncertainty from your winter. One afternoon of prep, or one professional visit, buys you an entire season of peace of mind.

What a Professional Fall Plumbing Inspection Includes
A professional fall plumbing inspection starts with every outdoor fixture on your property. Your plumber tests each hose bib for proper drainage, checks frost-free faucets for correct pitch, and confirms interior shutoff valves close fully. Worn washers, corroded stems, and failing valves get flagged before they become winter emergencies. Exposed piping in crawl spaces and along exterior walls is inspected for insulation gaps. The main shutoff valve is tested so you know it works when you need it. You receive a clear picture of your home’s freeze readiness in a single visit.
The inspection also covers systems homeowners rarely check themselves. Water pressure is measured, because excessive pressure combined with freezing stress accelerates pipe failure. Backflow preventers are examined for cracks and proper winterization. Water heaters get a once-over since they work harder in winter and often fail during the first cold stretch. Irrigation shutoffs and drain points are verified so your sprinkler system is truly empty. Any prior repairs or aging pipe sections are evaluated for freeze vulnerability.
Plumb Medic technicians document everything and explain your options in plain language. There is never pressure to buy services you do not need. If a repair is recommended, we waive the diagnostic fee when we handle the work. Financing is available through Wisetack for larger projects like repiping or valve replacements. You leave the inspection knowing exactly where your plumbing stands before winter arrives. That knowledge is worth more than any insurance policy.
Why Choose Plumb Medic for Your Outdoor Plumbing Winterization
Plumb Medic is Woodstock’s trusted local plumbing team, named Business Rate’s Best of Woodstock Plumber 2025. All of our technicians are fully licensed and experienced in every service we offer. We are TracPipe and Navien certified, which reflects our commitment to ongoing training and quality workmanship. Our team serves Woodstock, Marietta, Kennesaw, Canton, Roswell, Alpharetta, and communities across North Georgia. We treat every home like it belongs to a neighbor, because it usually does. Local roots mean we understand exactly how Georgia cold snaps behave.
We back our work with policies that put homeowners first. Diagnostic fees are waived when we perform the repair, so you never pay twice. Military and senior discounts are available on every service. Financing through Wisetack makes larger winterization and repiping projects affordable. We also donate 2% of every service call to Children’s Healthcare of Atlanta to support local families. Choosing Plumb Medic means investing in your home and your community at the same time.
Winter emergencies do not wait for business hours, and neither do we. Plumb Medic offers 24/7 emergency plumbing services across our entire service area. If a pipe bursts at midnight during the first freeze, our team answers the call. But the smartest move is preventing that call altogether with fall winterization. Schedule your outdoor plumbing prep today by calling Plumb Medic at (470) 384-9762 or emailing office@theplumbmedic.com. Visit us at 225 Creekstone Ridge Suite 19, Woodstock, GA 30188, and let us get your home ready before the first cold snap arrives.